
Microsoft Azure Active Directory B2C Drupal implementation

Jun 25, 2023
Maze
Part 1. Settings in Azure portal
  • Prerequisites
    You should login to Microsoft Azure with an account that is able to add or edit active directories.

    Also, you have to create an Azure Active Directory B2C  tenant. Manual
    - create an Azure AD B2C tenant
    - Link your tenant to your subscription
    - Switch to the directory containing your Azure AD B2C tenant
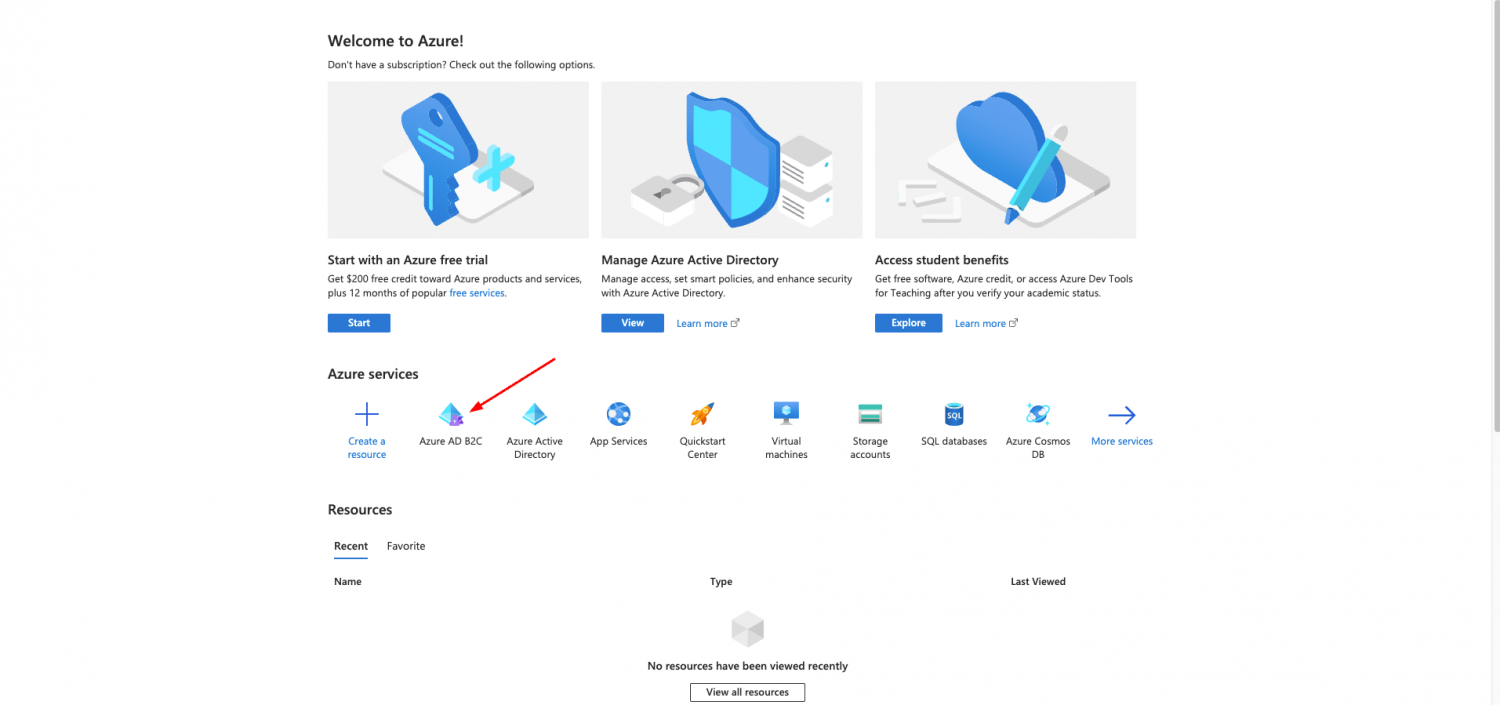
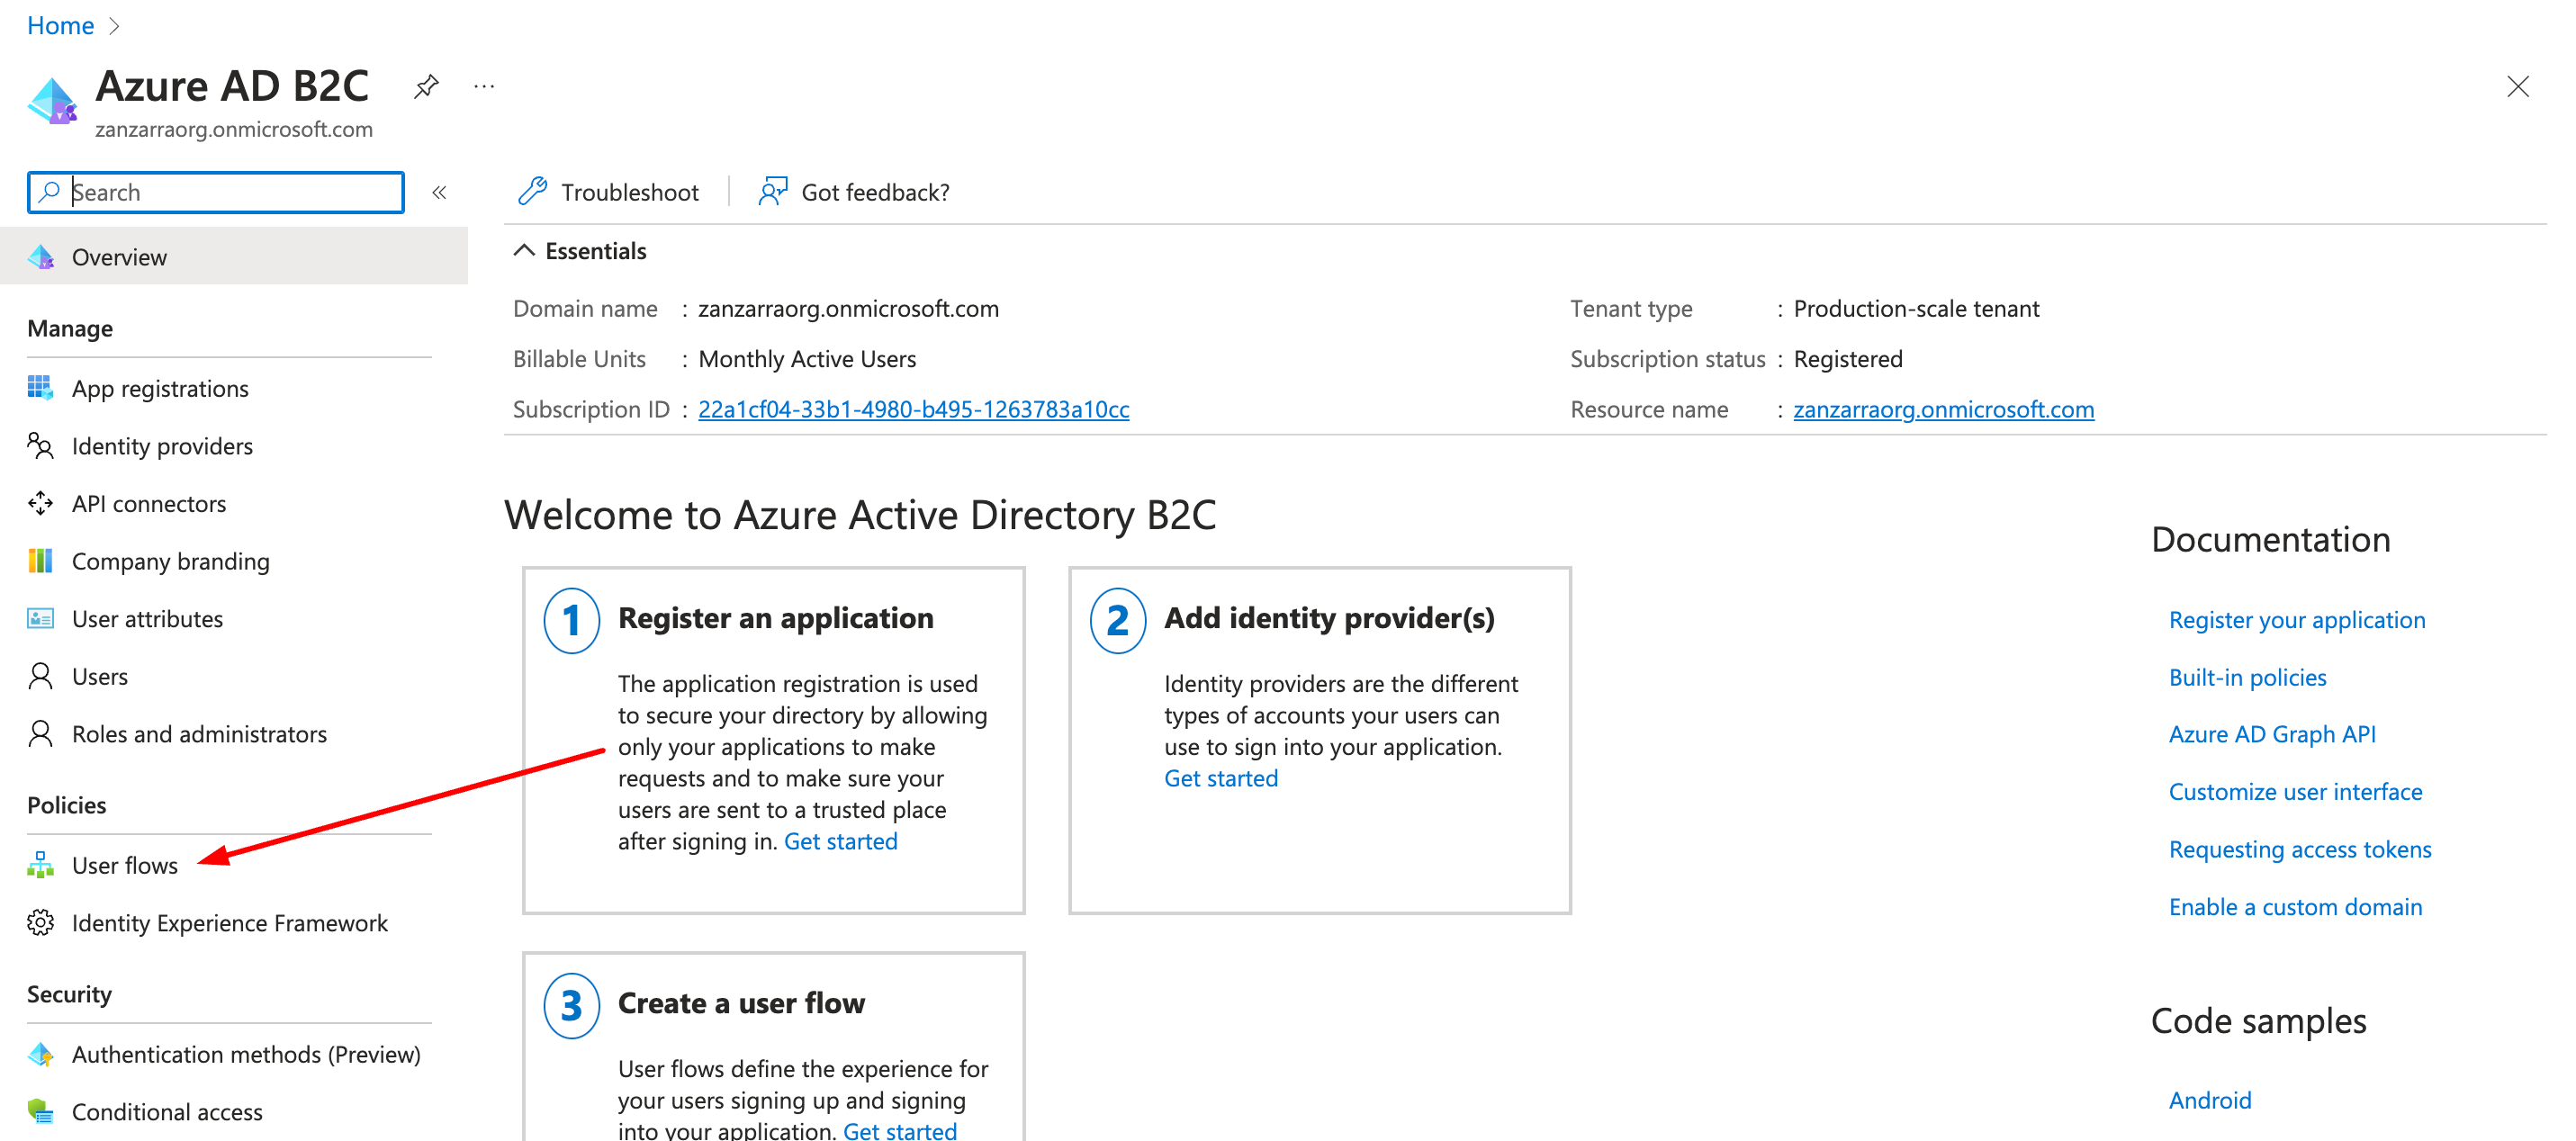
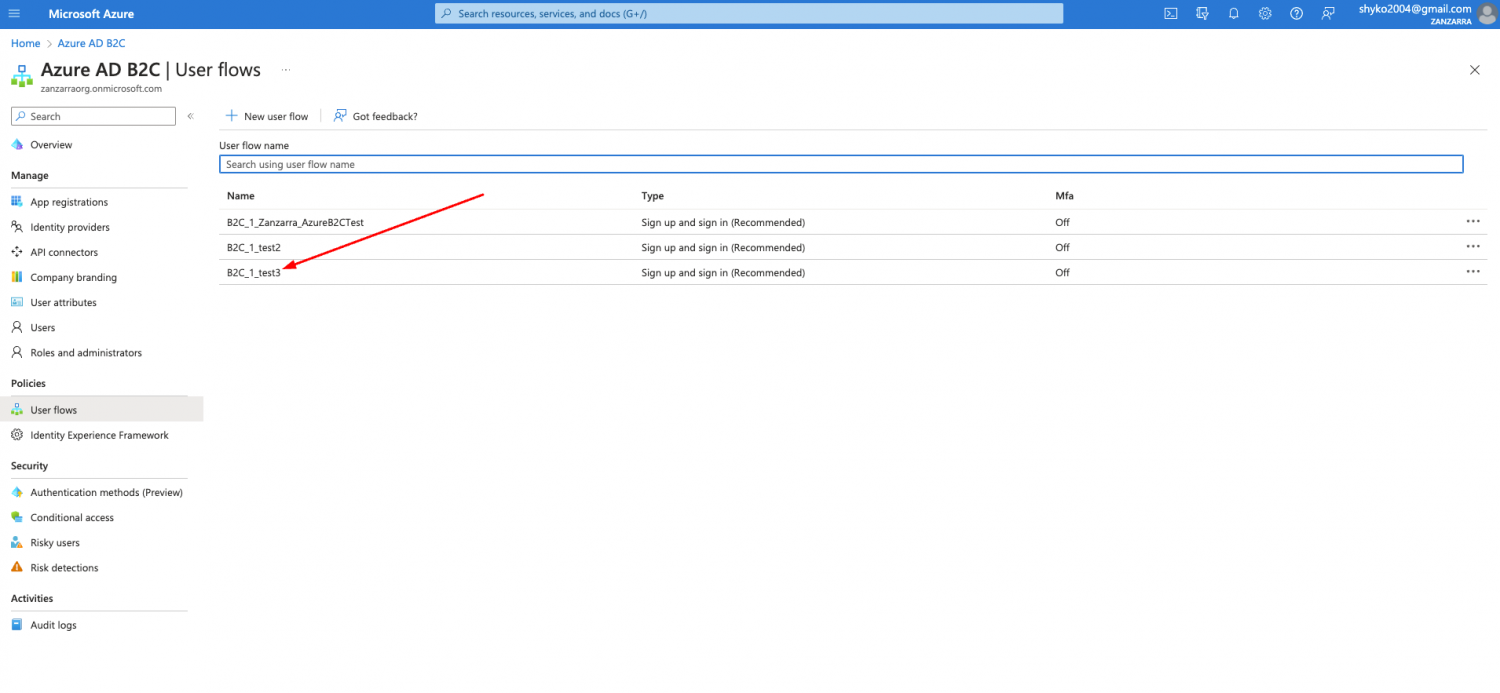
  • Steps in Azure
     - Login to portal.azure.com
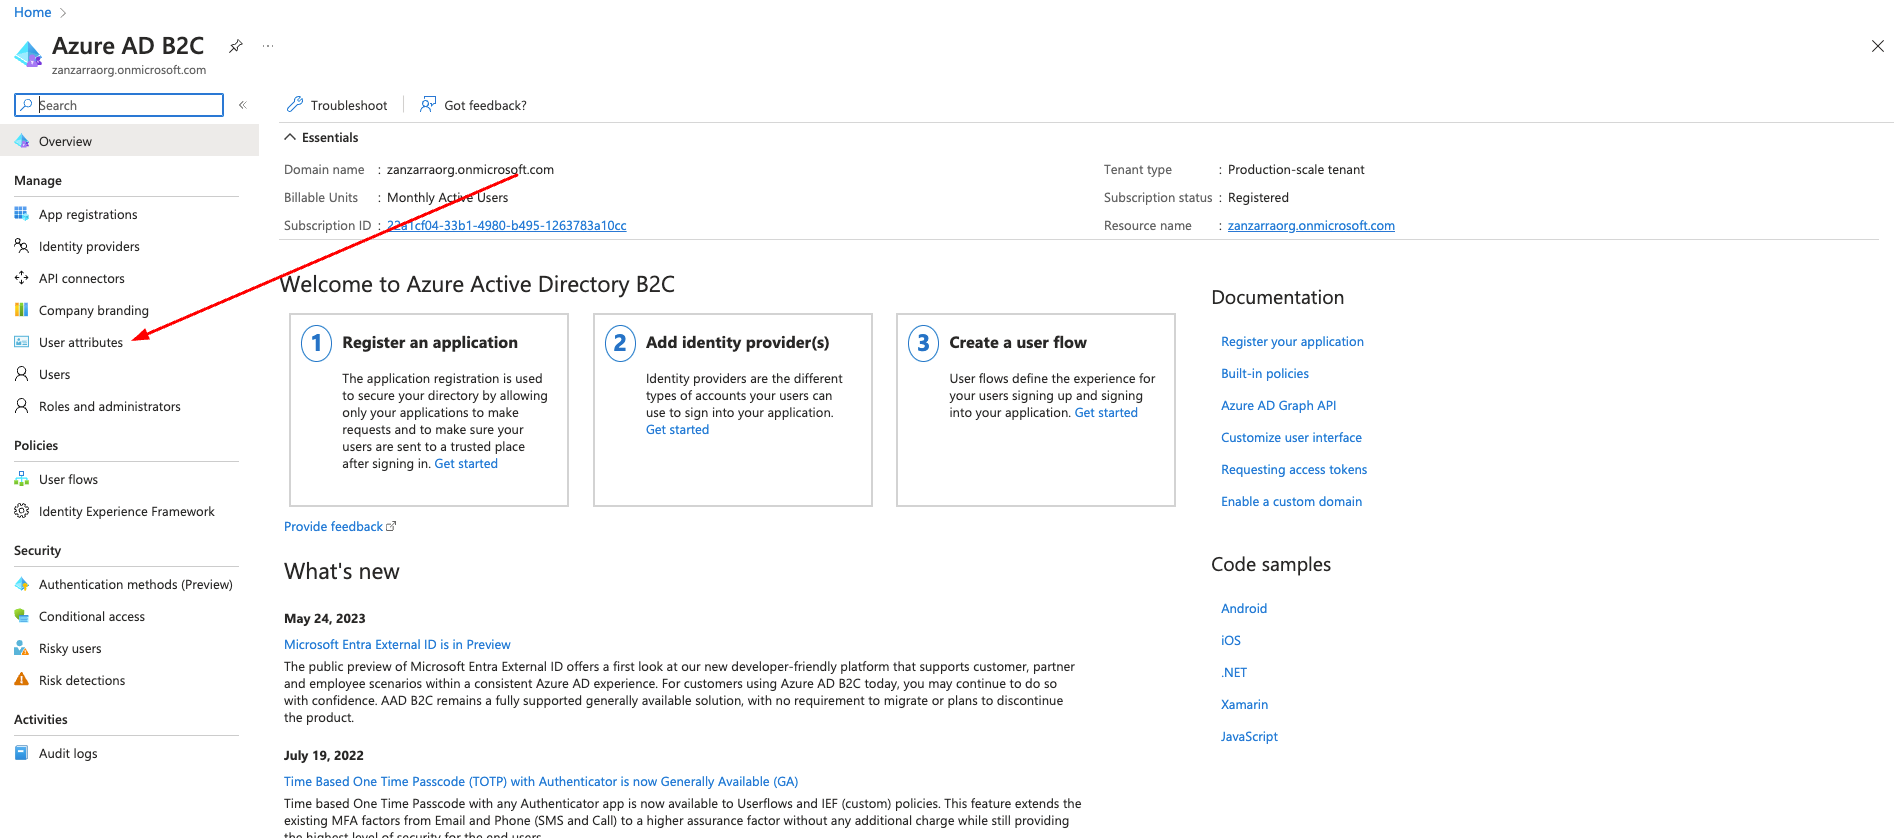
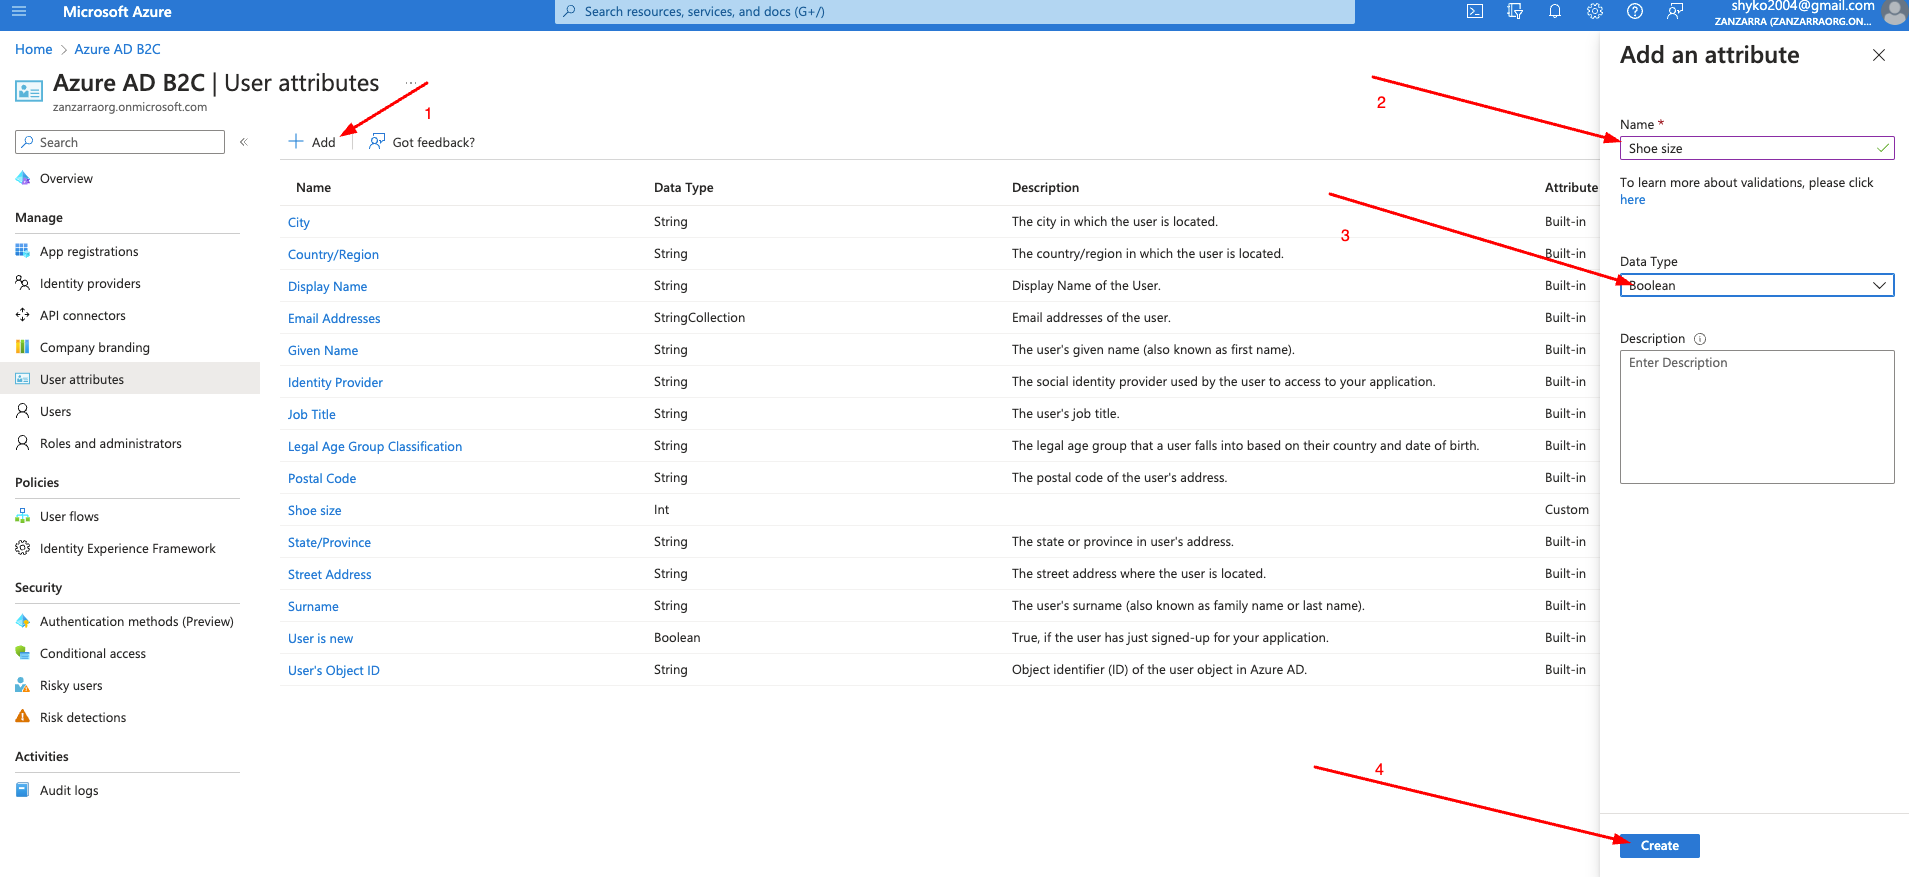
     - Choose Azure AD B2C from the menu

1

 - Go to App registrations and add one.The app registration tells Azure AD that we have an 'app' (your Drupal website) in which users belonging to your Active Directory can login using their Microsoft credentials and click on New registration

2
3

On the following screen set next values:

  • Name - set the app name. It can be changed later
  • Supported account types. Choose 3rd option - Accounts in any identity provider or organizational directory (for authenticating users with user flows)
  • Redirect URI - important field. This uri will be used by Azure to send the authentication token to your website. It should be like https://<your-website><path>.
  • <your-website>  - is your website base url
  • <path> - here should be the path that we will use in our Drupal integration. For    example, path can be openid-connect/drupal
  • So, when your domain (which needs to be ssl) is https://mywebsite.test, the request URI will be: https://mywebsite.test/openid-connect/drupal
  • Permissions - default

After the new app has been created, on the app page go to the Authentication page And set values as on screen. Change www.website.test to your website base URL.

9
8

Click on Save button at the bottom of the page.

Next go to the Certificates & secrets to generate secret key

rewr1

Click on New client secret and set Description and Expires(can be recommended) on the popup.You should save the client secret value in a safe place. We will use it later during Drupal integration.

10

Next, we are going to configure User flow. Click on New user flow and on the next screen select Sign up and Sign in user flow type and Recommended version. Then click on Create.

rewr2
12

On the next screen choose:

  • Name - as you wish
  • Identity providers - Email signup
  • Type of method - Email
  • MFA enforcement - Off
  • Enforce conditional access policies - leave empty
  • User attributes and token claims
    Click on Show more and on the popup choose what user attributes should be collected on sign up. Claims are values about the user returned to the application in the token
    Recommends to get Display Name and Email Address in the token.
    You can use following configuration:
16

Azure Active Directory B2C offers two methods to define how users interact with your applications: through predefined user flows or through fully configurable custom policies.
In your applications you may have user flows that enable users to sign up, sign in, or manage their profile. You can create multiple user flows of different types in your Azure Active Directory B2C (Azure AD B2C) tenant and use them in your applications as needed. User flows can be reused across applications. In most cases user flow is enough to cover all needs. But if you need more complex and flexible behavior of your Azure Active Directory B2C (Azure AD B2C) tenant, you can create a custom policy.

And a final step on this part. Go to the API Permissions page.
Click on Add new permission -> Microsoft Graph.
Application permissions -> find permission User.Read.All -> select it and click on Add permissions.

14
15
17

That’s all. We have already configured the Azure AD B2C application.

Part 2. Settings in OpenID Connect configuration in Drupal
  • Prerequisites
    You have an app registration in Microsoft Azure AD B2C.
     
  • Steps
  1. Install and enable OpenID Connect Microsoft Azure AD and Key modules.
  2. Apply a patch for the OpenID Connect Microsoft Azure AD module.
  3. Add a key of type Authentication via the Key module, Configuration > Keys. The value is the client secret, which you added in portal.azure.com.
  4. Once you added the key, go to Configuration >People OpenID Connect
  5. On the next screen set the following values.
    - Name - it will be added as a parameter to redirect URL. For example, if here we set drupal, your redirect URL would be https://mywebsite.test/openid-connect/drupal.
    Redirect URL should be similar as we added previously in Azure.
  6. Client ID - copy/paste from your azure application page
rewr3

      7. Client secret - set previously added secret key with Key module

      8. Authorization endpoint and Token endpoint we can get from your azure application page -> Endpoints

19

Change <policy-name> with User flow label we created previously in the azure portal.

20

9. User info endpoint configuration -> set 1st option Alternate or no user endpoint
10. Select Update email address in user profile.

11. All other fields should be as they are.
12. Above are crucial settings to have a working, basic OpenID Connect authentication with Microsoft Azure AD B2C.

Part 3. Custom user attributes

In some cases, we need to get user attributes other than default ones(email, username). So, to get custom user attributes we should do:

  • Azure part
    • go to your Azure AD B2C directory home page and click on User attributes
    • next, click on Add, then on popup set the Name(for example Shoe size), Data Type and click on Create
       
21
22
  • Then, go to User flows and select your current flow
23
  • On the flow page, select User attributes on the left menu, select your custom user attribute(Shoe size in our case) and click on Save
24
Let's get ready to rumble!!!
  • Next, click on Application claims on the left menu, then select your custom user attribute(Shoe size in our case) and click Save.
1
  • So, in the above steps, we’ve configured a custom user attribute. It will be displayed on the user registration form and sent within the access token with other user info to our Drupal application.
  • During the authorization process on the Drupal side, we can get our custom attribute value and, for example, add it to the user profile field. Some custom code and hook_openid_connect_userinfo_save() function will help us to do it.
    Below is primitive code block to get and save custom user attribute
/**
 * Save userinfo hook.
 *
 * This hook runs after the claim mappings have been applied by the OpenID
 * Connect module, but before the account will be saved.
 *
 * A popular use case for this hook is mapping additional information like
 * user roles or other complex claims provided by the identity provider, that
 * the OpenID Connect module has no mapping mechanisms for.
 *
 * @param \Drupal\user\UserInterface $account
 *   A user account object.
 * @param array $context
 *   An associative array with context information:
 *   - tokens:         Array of original tokens.
 *   - user_data:      Array of user and session data from the ID token.
 *   - userinfo:       Array of user information from the userinfo endpoint.
 *   - plugin_id:      The plugin identifier.
 *   - sub:            The remote user identifier.
 *   - is_new:         Whether the account was created during authorization.
 *
 * @ingroup openid_connect_api
 */
function hook_openid_connect_userinfo_save(UserInterface $account, array $context) {
  $shoe_size = $context['userinfo']['shoe_size'];
  $account->set('field_shoe_size', $shoe_size);
}
Part 4. Set up profile edit flow

To make it possible for users to edit profiles, we should add profile editing user flow.
Here is the link to a detailed guide to add profile editing user flow.
Several notices:
- after the profile editing user flow was created, you should update User attributes and Application claims section to select editable user attributes
 -  next, go to the newly-created profile editing user flow

3
rewr4
  1. click on Run user flow
  2. select your current Application
  3. copy the provided URL. This URL can be used to edit a user profile from your Drupal application.
Aaaaand that's it!

I know I know you are already tired, but we are finally done. I hope this article was useful for you and you've received answers for all questions. See you...